side seal groove too wide?
#1
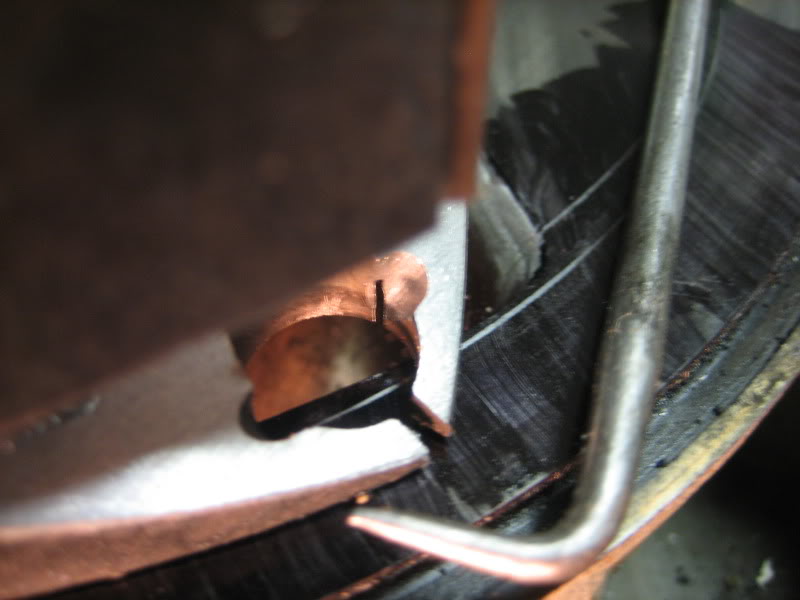
building an engine, and one rotor has side seal to groove clearances that are way big like .003" but only on one side, the other side is ok. side seals are too short!
i just wish i would have found this BEFORE i cleaned it and fit all the seals to the other side!
i just wish i would have found this BEFORE i cleaned it and fit all the seals to the other side!
#2
Keep that one and cut a corner out on the gear side leaving only a 1/4" thick plate so you can see the corner seal and can see side seal groove ends and corner seal hole from inside the rotor.
That is the piece you need to produce your own port timing masks, or just copy known timing events on to your plates.
Then buy a replacement rotor.
Lynn E. Hanover
#3
Keep that one and cut a corner out on the gear side leaving only a 1/4" thick plate so you can see the corner seal and can see side seal groove ends and corner seal hole from inside the rotor.
That is the piece you need to produce your own port timing masks, or just copy known timing events on to your plates.
Then buy a replacement rotor.
Lynn E. Hanover
That is the piece you need to produce your own port timing masks, or just copy known timing events on to your plates.
Then buy a replacement rotor.
Lynn E. Hanover
oooo and i can use the other side for the side seal cutting jig!
#4
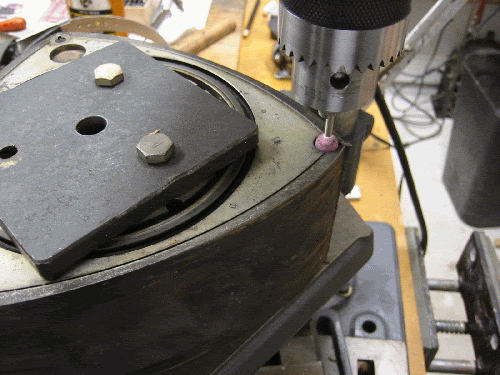
Right, clamp the rotor up in a drill press. Lower a dremel sanding drum or cylindrical stone into a corner seal hole and lock the quill down with the drum or stone nearly touching the end of the seal groove.
Drill away some material along the groove just beyond the opposite corner seal hole where you can hold onto the seal.
Finish sand the seal by feeding it into the sanding drum until the other end nears the edge of the opposing hole. Stop and measure by installing into the groove you are building up. Use a diamond file to dress the sanded end, just breaking the edges.
Adjust to .001" or less for NA engines other than Renesis. Perfect sealing. Instant starts. I can make a picture if you need one.
This goes very fast with factory like results. Lots of grinding dust. clean everything before assembly.
Lynn E. Hanover
#6
its so weird. this engine is being built from a pile of parts they gave me.
#1 rotor is fine
#2 apparently fell down the stairs, and its got a bent corner seal hole
#3 has the loose side seal grooves, like .004 longer than any of the ones on the other side of even that rotor, or rotor #1. side seal to groove is like .003 on just that one side
#4. has only 1 side seal groove that's too long... seals that are .002, are .004 in this one? seal to groove is ok
very weird!
#7
Right, clamp the rotor up in a drill press. Lower a dremel sanding drum or cylindrical stone into a corner seal hole and lock the quill down with the drum or stone nearly touching the end of the seal groove.
Drill away some material along the groove just beyond the opposite corner seal hole where you can hold onto the seal.
Finish sand the seal by feeding it into the sanding drum until the other end nears the edge of the opposing hole. Stop and measure by installing into the groove you are building up. Use a diamond file to dress the sanded end, just breaking the edges.
Adjust to .001" or less for NA engines other than Renesis. Perfect sealing. Instant starts. I can make a picture if you need one.
This goes very fast with factory like results. Lots of grinding dust. clean everything before assembly.
Lynn E. Hanover
ive seen a jig like that either in a japanese rx7 magazine or a video...
Thread
Thread Starter
Forum
Replies
Last Post
John V
Rotary Engine Building, Porting & Swaps
3
04-03-2010 06:51 PM
White_FC
Rotary Engine Building, Porting & Swaps
4
03-11-2004 11:45 PM
Currently Active Users Viewing This Thread: 1 (0 members and 1 guests)


